
How to Create a Facebook Ad Account (2026)
The honest 2026 setup checklist: build a business portfolio, create or connect a Page, make the ad account, add billing, and assign task access.
Updated December 2026 · Likit Sae Lee, CTO

To create a Facebook ad account in 2026, build a business portfolio (formerly Business Manager) at business.facebook.com, connect or create your Facebook Page inside it, then create the ad account and lock its currency and timezone, which cannot be changed later. Add a verified payment method, assign people through task access rather than old Admin or Editor roles, and verify your business if you plan to scale. The whole flow takes about 20 minutes, but Meta starts new accounts with a low daily cap (often $25 to $50 per day) that rises with clean billing history, so set up properly the first time.
You have a product, a budget, and a plan to run your first Facebook ad. Then you hit the part nobody warns you about: the account plumbing. Business portfolio, Page, ad account, billing, roles, verification, each in the right order, each with a gotcha that bites later if you rush it. Get the sequence wrong and you are emailing support a week before launch about a payment method that will not attach or a currency you can no longer change. This is the honest setup checklist, written for someone doing it once and wanting it done right.
Why the account setup is worth doing properly
The reach on the other side of this setup is enormous. Facebook had 3.07 billion monthly active users as of late 2023, per figures Search Engine Land attributes to Meta. Around 200 million businesses use Meta apps to reach customers each month, a Meta-reported number surfaced in Shopify's statistics roundup, so treat it as directional. You are joining an auction with roughly 10 million active advertisers, a Statista figure dating to around 2020 that Search Engine Land surfaces as the last public count, so treat it as directional rather than fresh, all competing for the same feeds.
That scale is the reason to slow down for twenty minutes now. A clean setup is not bureaucracy. It decides who controls your spend, whether you can hand work to a freelancer without surrendering your Page, and how fast Meta trusts you with a bigger daily budget. The plumbing you lay today is hard to re-route later, and one of the choices is literally permanent.
The cost side is reachable for a first campaign. WordStream's 2026 guide suggests starting at $5 to $10 per day, and its 2025 benchmarks put the average Facebook click-through rate for traffic campaigns at 1.71%, with traffic clicks averaging $0.70 and lead clicks averaging $1.92. Those are neutral, dated figures and a realistic backdrop: a small daily budget can buy a meaningful number of clicks once the account is live.
Before you start: have these five things ready
Half the stalls people hit are not Meta's fault, they are a missing piece discovered mid-flow. Line these up first and you will not have to stop and hunt:
- A personal Facebook profile. The business portfolio is created and owned through a real personal account, so you sign in with yours.
- A business email, ideally on your own domain. The portfolio's email feeds verification later, and a domain address (you@yourbrand.com) matches your records far more cleanly than a free inbox.
- A valid payment card in the currency you sell in. The card has to match the ad account's locked currency, so know which currency that is before you create the account.
- A published Facebook Page. Feed ads cannot run without one, and this is where most first-timers get stuck. If you do not have a Page yet, step two builds it.
- Your business registration document. You do not need it on day one, but business verification later checks your legal name and address against it, so know where it is.
The setup sequence at a glance
Meta never hands you a single numbered checklist, but the order is implied by how the tools depend on each other. WordStream's eight-step setup walkthrough confirms the same backbone. Do it in this sequence and nothing blocks anything downstream.
| Step | Where it happens | The gotcha to watch |
|---|---|---|
| Create business portfolio | business.facebook.com | A personal profile can own only 2 portfolios. |
| Connect or create the Page | Business Settings, Pages | Most people stall here; you need a real published Page. |
| Create the ad account | Business Settings, Ad Accounts | Currency and timezone are permanent. |
| Add a payment method | Business Settings, Payments | Must be verified before ads deliver. |
| Assign people | Business Settings, People | Use task access, not full control, for staff. |
| Verify the business | Security Center | Optional at first, needed to scale. |
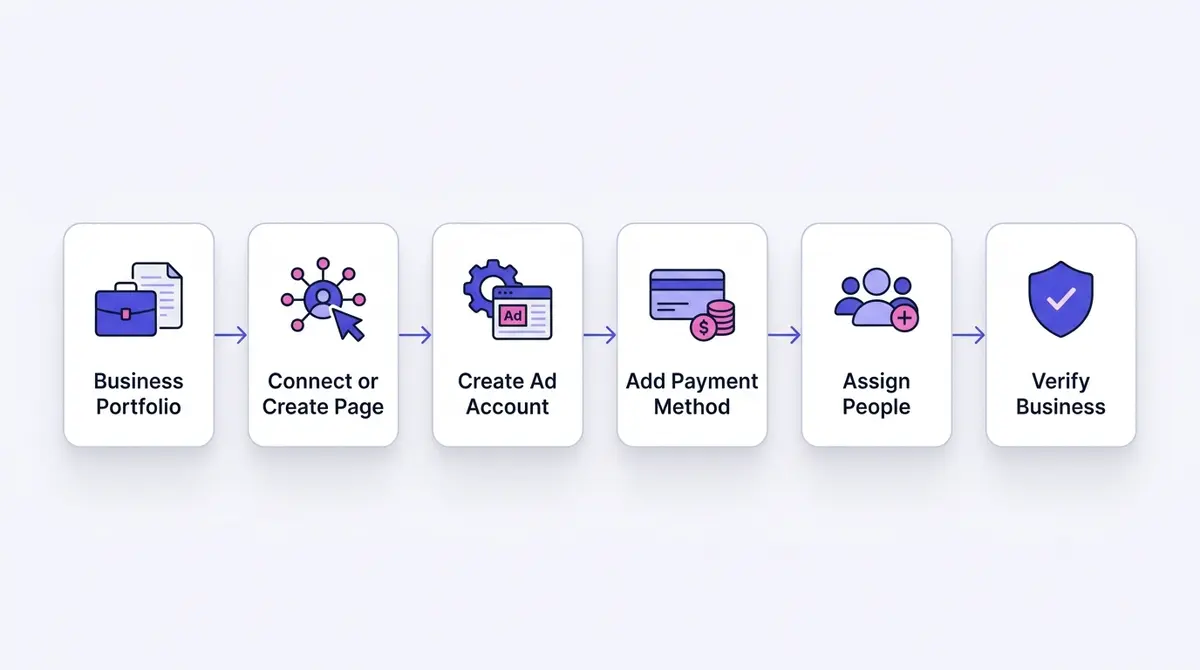
Read the table top to bottom before you touch anything. The order is not arbitrary: each step builds on the one above it. The portfolio comes first because it is the container everything else lives inside. The Page comes before the ad account because feed ads cannot run without one, and discovering that mid-setup means backing up a step. Currency comes before billing because the payment method has to match the account's locked currency. Verification sits last because nothing before it depends on it; it only unlocks more room once you are live. The two rows that cause real pain are the Page and the currency, and both are easier to handle when you see them coming.
Step one: create your business portfolio
Go to business.facebook.com and sign in with your personal Facebook profile. The portfolio is the container that will own your Page, your ad account, your payment methods, and your team. Meta renamed Business Manager to business portfolio, so if a tutorial says Business Manager, it means this. For searchers still using the old term, it is the same thing.
Click Create account, then enter your business name, your name, and a business email. Use an email on your own domain if you have one, because verification later checks how cleanly your details match public records. One important limit: a single personal Facebook profile can own a maximum of two business portfolios, a cap Graphed documented in late 2025. If you manage many brands, plan that constraint in advance rather than discovering it when Meta blocks a third.
Once the portfolio exists, everything else lives inside Business Settings, the gear-icon area on the left. This is your control room for the rest of the checklist. Take a minute to fill in the portfolio's own details while you are here: the legal business name, the primary email, and a website if you have one. These fields feed straight into business verification later, and a portfolio with a complete profile clears that check faster than a half-empty one. It is far easier to enter accurate details now than to reconcile a mismatch when Meta flags it weeks down the line.
One portfolio or several
Most businesses need exactly one portfolio holding all their assets. Spin up a second only when you have a genuinely separate legal entity or a clean client-agency split, because each portfolio carries its own verification, its own limits, and its own people. More portfolios means more places to keep tidy, and you only get two per profile anyway.
Step two: connect or create your Facebook Page
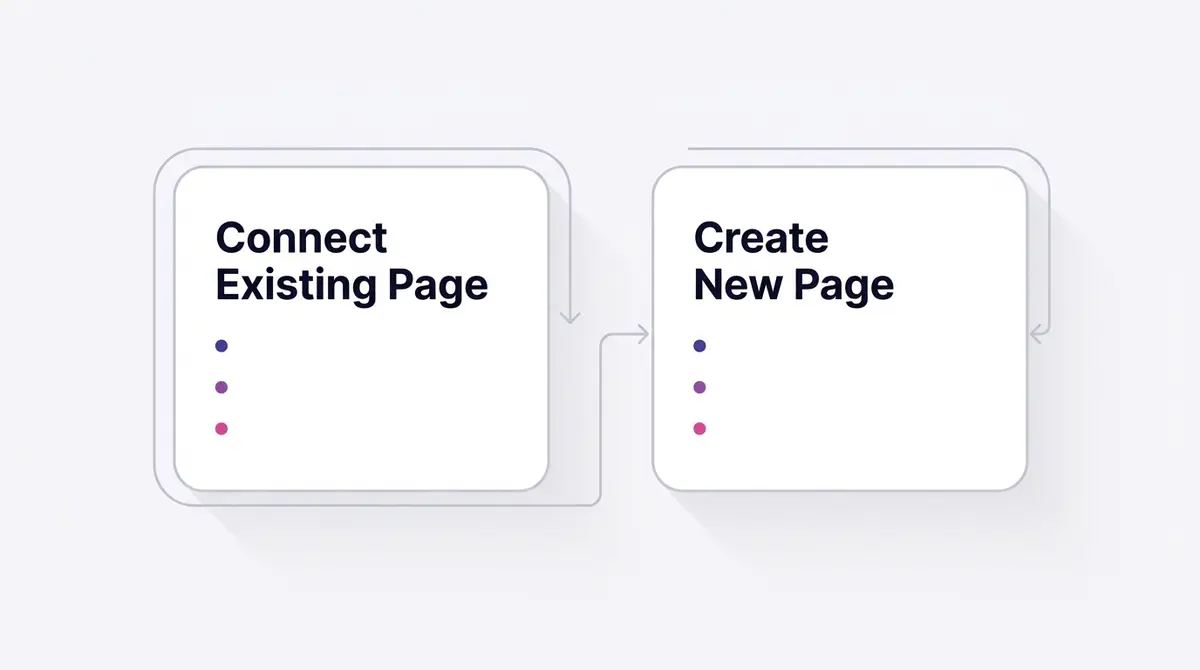
This is the step the quick guides skip, and it is where most first-timers get stuck. An ad account cannot run feed ads without a Page to run them from. The Page is the identity your ads wear in the feed: the name, the profile photo, the blue tick if you have one.
If you already have a Page, connect it. In Business Settings, open Pages, click Add, and choose Add a Page. You must have full control of that Page on your personal profile for the portfolio to claim it cleanly. If the Page belongs to someone else, request access instead, and they approve it from their side.
If you do not have a Page, create one now. From Business Settings, Pages, Add, choose Create a new Page, then enter the name, category, and a short description. Add a profile image and cover image before you launch ads, because a bare Page reads as untrustworthy to both people and to Meta's review systems. A clinic like UR Klinik, for instance, connects its established Page first so booking-led campaigns inherit an identity people already recognise, rather than launching from a blank slate.
Do not treat the Page as a footnote. A complete Page with real posts, a clear category, and a filled-out About section helps your ads pass review faster and builds the history that later lifts your spending limits. A skincare seller like Skinlycious launching a debut testimonial campaign benefits from a Page that already looks like a real shop, not an empty shell created an hour before the first ad.
Connect your Instagram account too
A Facebook Page lets your ads run in the Facebook feed. To also run them on Instagram and in Reels, where a large share of attention now sits, connect an Instagram account to the same portfolio. Without it, every ad you build stays Facebook-only, even though Meta serves a single ad across both apps.
Add it in Business Settings under Accounts, Instagram accounts (or in Meta Business Suite under Settings, then Add Accounts, Instagram), and sign in to the Instagram professional account you want to use. Once it is linked to the portfolio and the ad account, a single ad can be placed across Facebook, Instagram, and Reels, and you choose those placements when you build it. Doing this now means you never have to rebuild a campaign later just to reach the Instagram side of your audience.
Step three: create the ad account and lock its settings
With the portfolio and Page in place, open Business Settings, Ad Accounts, click Add, then Create a new ad account. Name it something you will recognise in a list later, your brand name plus the market is plenty.
Now the permanent choices. You will set the ad account's currency and timezone, and neither can be changed after creation. Pick the currency you are actually billed in, because a mismatched currency means re-creating the whole account later. Pick the timezone you report results in, because all your reporting and daily budget resets run on it. This is the single most common honest-checklist regret, so pause here and get it right.
Assign the ad account to your portfolio and link it to the Page you set up. One note on limits: each portfolio has its own ad account creation cap that often starts at one and grows automatically with spend and on-time billing. There is no universal maximum, so do not trust a tutorial that quotes a fixed number. Check Meta's official Find Your Business Portfolio's Ad Account Limit page, and view your current limit directly in Business Settings.
Two related limits are fixed rather than trust-based, which is worth knowing if you plan to share access. A single ad account can be assigned to a maximum of 25 people, and one person can be assigned to a maximum of 25 ad accounts, per Meta's ad account limits. Neither moves with spend or payment history the way the creation limit does. They rarely bite a small team, but an agency or multi-brand owner should know the ceiling exists before building out.
If you only need one ad account, that single slot is plenty. Resist creating extra accounts speculatively, because each one starts cold with the same low daily cap and no billing history. Concentrate spend in one account so it builds trust and earns higher limits, then split into a second only when a genuine reason appears, such as a separate brand or a distinct billing entity that needs its own invoices.
Step four: add a verified payment method
An ad account with no valid payment method will build campaigns but never deliver them. Open Business Settings, Payments, or the billing section of Ads Manager, and add a card or another supported method. The options depend on your country and currency, and commonly include credit and debit cards, with PayPal and local methods available in some markets.
New accounts usually start on threshold or prepaid billing, where Meta charges you as you hit set amounts rather than once a month. Monthly invoicing is something Meta extends only after you have built a spend and trust history. That is normal, not a downgrade, and it works in your favour: it caps how much an early mistake can cost.
Expect a low ceiling at first. New accounts run under a daily spending limit that Meta sets and raises over time, so begin at WordStream's suggested $5 to $10 per day and let the billing history build. The next section breaks down that cap alongside the two other spend controls that trip up new advertisers.
The three spend controls every advertiser confuses
New advertisers almost always blur three different things into one, then wonder why the billing behaves strangely. They are set by different parties and do different jobs. Get them straight once and the charges stop being a mystery.
| Control | What it is | Who sets it | What happens when it is reached |
|---|---|---|---|
| Payment (billing) threshold | The amount you accrue before Meta charges your card | Meta, rising as you pay | Meta charges your card, clears the balance, and you keep running |
| Account spending limit | A lifetime ceiling on total spend across all campaigns | You, optionally | Every active campaign pauses until you raise, remove, or reset it |
| Daily spending limit | A cap on how much the account can spend in a day | Meta, on new accounts | Delivery stops for the day, then resumes the next day |
The payment threshold is a billing trigger, not a spending limit. A new account often starts with an example threshold around $25 in Meta's own documentation: once your unpaid costs reach it, Meta charges your card, clears the balance, and the threshold may step up as your payment history proves out. That is why a brand-new account can be charged several times in a month rather than once. It is not overspending, it is the threshold doing its job, and it climbs as Meta starts to trust you.
The daily spending limit set by Meta is the delivery cap, the one that keeps a fresh account from spending big before it has a track record. It resets each day and rises gradually as you stay in good standing. This is the cap that makes a new account feel slow, and it is the one a vendor analysis of managed accounts pegged at roughly $25 to $50 a day at the start (directional, not a fixed rule). That same analysis put the median climb from a $50 to a $1,000 daily cap at about 47 days of clean billing, with verified accounts moving faster.
Set an account spending limit as your safety ceiling
The one spend control you fully own is the account spending limit, and it is your best guardrail against a runaway mistake. Set it in Payment Settings inside your billing tools: name a maximum total the account may ever spend across every campaign. When spend reaches it, Meta pauses all active campaigns at once, even ones whose own budgets are nowhere near exhausted. To start running again you raise the limit, remove it, or reset the amount already counted toward it. A safe habit is to set it a little above your planned monthly spend, so a misconfigured campaign cannot quietly drain a card. Remember it is a hard stop: if your ads pause without warning, check here first.
Step five: assign people with task access, not old roles
If you are a solo operator, you already have full control and can skip ahead. The moment a freelancer, agency, or teammate is involved, this step protects you.
Forget Admin, Editor, and Advertiser. For New Pages and modern portfolios, Meta replaced those roles with two clearer levels. Full control, labelled Facebook access, is the new equivalent of Admin and should stay with as few people as possible, ideally just you and one trusted backup. Task access is granular: you grant exactly the jobs a person needs, such as create ads, manage campaigns, or view performance, without handing over the keys to delete the Page or remove other people.
Assign access in Business Settings, People. Add the person by email, then choose the specific assets, the Page and the ad account, and the precise tasks for each. A small business handing campaign work to a marketing freelancer, the way a brand like Dasher Smart Home might, gives that freelancer create-ads access on the ad account and leaves full control with the owner. When the engagement ends, you remove one person and lose nothing.
What happened to Admin, Editor, and the classic roles
If you have searched "Facebook Page roles" and seen Admin, Editor, Moderator, Advertiser, and Analyst, here is the reconciliation. Pages moved to the New Pages Experience no longer use those six roles. They use Facebook access with full control (the old Admin) or partial control (close to the old Editor), plus task access for everything granular. Pages that have not been migrated still run on the classic six roles, which is why two guides can describe the same thing in different words. The practical rule holds either way: keep full control with as few people as you can, and give everyone else only the specific tasks they need. If your Page shows the two-level access model, you are on the new experience and task access is your tool.
Secure the account before it holds real money
A business portfolio holds your Page, your ad account, and a saved payment method, which makes it a target. Account takeovers are common, and the fix is cheap. Turn on two-factor authentication for your own login first, so a stolen password alone cannot get in.
Then, if you have full control of the portfolio, enforce it for everyone who touches the account. In Settings, under Business portfolio info, the two-factor authentication requirement has three options: No one, Admins only, or Everyone. Admins only is a sensible balance for most teams, covering the people who can move money and change settings, while Everyone is stricter and worth it once your team is set up to handle it. Only a full-control user can change this setting, which is itself a reason to keep that level of access tight. Do it on day one, while there is nothing to lose, rather than after an incident.
Step six: verify your business when you are ready to scale
You can launch a first campaign without business verification, but it is worth starting early if growth is the plan. Verification confirms the legal entity behind your portfolio and can unlock higher spending limits, additional billing options, and features needed to use Meta's APIs at scale.
Start it from the Security Center in Business Settings. You will submit your legal business name, address, and supporting details, and Meta checks them against public records. The cleaner the match between what you enter and what appears in official registries, the faster it clears. Decisions can land in minutes or take several business days, so do not leave it until the week you plan to scale spend. Meta's Verify Your Business help page lists the current requirements, and they shift, so treat that page as the source of truth rather than any third-party walkthrough.
The most common reason verification stalls is a mismatch you could have avoided. If your portfolio name reads slightly differently from your registered legal name, if the address is abbreviated one way in your records and another way in Meta's, or if the supporting document is from a different entity than the one named in the portfolio, the system either rejects the submission or kicks it to manual review. Before you submit, line up your business registration document, confirm the exact legal name and address it carries, and enter those character for character. A clean first submission can clear quickly; a sloppy one can loop through resubmissions for weeks.
The three verifications people confuse
"Verification" means three different things on Meta, and searchers mix them up constantly:
- Business (entity) verification confirms the legal business behind your portfolio, checked against public records. It is free, and it unlocks higher limits and API access. This is the one the steps above describe.
- Domain verification proves you own a website domain. It is a prerequisite for controlling your own conversion events and for Aggregated Event Measurement, so any serious tracking setup needs it. Do it under Brand Safety, Domains in Business Settings, by one of three methods: a DNS TXT record, an HTML file uploaded to your site root, or a meta tag in your homepage header. Pick whichever your site setup makes easiest.
- Meta Verified is a separate paid subscription that adds a blue badge, proactive impersonation monitoring, and access to direct support. It is not the free entity check and it does not replace it. Confirm current plans and pricing on Meta's own Meta Verified for business page before committing, because they change.
If you plan to track conversions, line up domain verification alongside business verification, because it gates the tracking work covered in the Meta Pixel setup and Conversions API setup guides.
When setup goes wrong: the common first-week fixes
The intro promised to spare you a support week, so here are the failures that actually happen and what each usually means.
Your payment method will not attach. Most often the card details do not match the billing country or the account currency, the card issuer is blocking an unfamiliar charge, or the card type is not supported in your market. Re-enter the details exactly as they read on the statement, try a different supported card, and check for a small verification charge or a bank notification waiting for your approval.
Your brand-new account is disabled at creation. Meta sometimes flags fresh accounts automatically, before you have run anything, on signals like a brand-new profile, a payment method seen elsewhere, or activity that pattern-matches abuse. It is usually not personal and is frequently reversible: request a review through the Account Quality section and supply any identity or business details requested. The restricted ad account guide walks the appeal in detail.
You see "ad account not found" or cannot open Ads Manager. This usually means the ad account is not assigned to your portfolio or your user, or you are signed into the wrong profile. Open Business Settings, confirm the ad account sits under the right portfolio, and check that your own user has access to it.
If an ad rather than the account gets held up, that is the review queue, not a setup fault, and the ad in review guide covers what to expect.
What to do the moment the account is live
A live account is a starting line, not a finish. Before you build a single campaign, do three quick sanity checks. Confirm the currency and timezone are what you intended, because this is your last easy chance to notice a mistake while it is cheap to fix. Confirm the payment method shows as active, not pending. Confirm your Page is published and linked to the ad account.
Then start small and let the system learn. A $5 to $10 daily budget, the range WordStream recommends for new accounts, gives Meta enough signal without risking much. With the average traffic-campaign click-through rate at 1.71% and traffic clicks near $0.70 per WordStream's 2025 benchmarks, even a modest budget buys real data. Watch your daily cap rise over the first weeks as billing history accrues, and resist the urge to verify, scale, and add five people all on day one. Keeping research, creative generation, editing, and Meta launch inside one workflow, the way a platform like AdPlay.ai does, cuts down the tool-switching once your account is humming, but the foundation is this setup done cleanly. From here, the natural next steps are learning the tool you will live in, our Facebook Ads Manager guide, and building your first campaign with how to run a Facebook ad.
Example ad angles
Representative hooks and formats from the category.
“Testimonial ad for a first-time advertiser launching a debut skincare campaign from a fresh portfolio”
“Instant-form ad for a clinic connecting its Page and payment method before booking campaigns”
By the numbers
Frequently asked questions
Do I need a Business Manager to create a Facebook ad account?
Not strictly, but you should use one. You can technically create an ad account from a personal profile, but that ties your business spend to your personal identity and limits how you share access. The cleaner path in 2026 is to create a business portfolio (the current name for what was Business Manager) at business.facebook.com, then create the ad account inside it. The portfolio holds your Page, ad account, payment methods, and people in one place, and it survives a staff change without locking you out.
Can I change my ad account currency or timezone later?
No. The currency and timezone you choose when you create the ad account are permanent for that account. This is the single most common setup regret. If you pick the wrong currency, your only fix is to create a new ad account with the correct settings and rebuild your campaigns there. Choose the currency you will actually be billed in and the timezone you report results in before you click create.
What is the difference between a payment threshold and an account spending limit?
They are easy to confuse but do opposite jobs. The payment threshold is a billing trigger set by Meta: once your unpaid ad costs reach it (a new account often starts around $25), Meta charges your card, clears the balance, and you keep running, which is why a new account can be billed several times a month rather than once. The account spending limit is an optional ceiling you set on total spend across the whole account; when spend reaches it, every active campaign pauses until you raise, remove, or reset it. The threshold decides how often you are charged. The limit decides when everything stops.
Why is my new ad account limited to a small daily spend?
Meta sets a daily spending limit on brand-new accounts to protect against fraud and runaway spend, and it resets each day and rises as you build clean billing history. One vendor analysis of managed accounts put the typical first-day cap around $25 to $50 per day, treat that as directional rather than a fixed rule. The same analysis found the median account took about 47 days to climb from a $50 to a $1,000 daily cap, and verified accounts with Page history moved faster. This is separate from the optional account spending limit you set yourself.
How do I add people to my ad account without giving them full control?
Use task access. For New Pages and modern portfolios, Meta replaced the old Admin, Editor, and Advertiser roles with two levels: full control (called Facebook access) and granular task access. Task access lets you grant exactly what a person needs, such as create ads or view performance, without letting them delete the Page or remove other people. Assign access in the portfolio's People settings, and keep full control to the smallest possible group.
What is the difference between business verification, domain verification, and Meta Verified?
Three separate things. Business verification confirms the legal entity behind your portfolio against public records; it is free and unlocks higher limits and API access. Domain verification proves you own a website domain (via a DNS TXT record, an HTML file, or a meta tag) and is a prerequisite for controlling your own conversion events and Aggregated Event Measurement. Meta Verified is a paid subscription that adds a blue badge, impersonation monitoring, and direct support, and it does not replace the free business check. Most advertisers need business verification to scale and domain verification to track conversions; Meta Verified is optional. Confirm current Meta Verified plans and pricing on Meta's own page before subscribing.
How do I protect my ad account and Page from being hacked?
Turn on two-factor authentication for your own login first, so a stolen password alone cannot get in. If you have full control of the business portfolio, go further and enforce it: in Settings, under Business portfolio info, the two-factor authentication requirement offers No one, Admins only, or Everyone. Admins only is a sensible baseline because it protects the people who can move money and change settings, and Everyone is stricter. Only a full-control user can change this, so keep full control to a small, trusted group, review who has access periodically, and remove anyone who no longer needs it.
What is the difference between Meta Business Suite, Business Manager, and Ads Manager?
Meta Business Suite is the umbrella account at business.facebook.com where your Page, Instagram, inbox, and business settings live. Business Manager is the old name for the business portfolio inside it, the container that owns your assets and people. Ads Manager is the separate tool where ad accounts, campaigns, and reporting live. You set up the portfolio and ad account first, then move into Ads Manager to actually build and launch ads.
Sources
- 1.Search Engine Land, Facebook statistics for marketers (2025)
- 2.Shopify, 53 Key Facebook Statistics for Business Owners (2024)
- 3.WordStream, Facebook Ads Benchmarks 2025 (2025)
- 4.WordStream, How to Advertise on Facebook (2026)
- 5.Graphed, How Many Meta Business Portfolios Can You Have? (2025)
- 6.Meta Business Help Center, Find Your Business Portfolio's Ad Account Limit (2026)
- 7.Meta Business Help Center, Verify Your Business in Meta Business Suite (2026)
- 8.EcomParkour, Facebook Ad Account Daily Spending Limit (2026)
- 9.Meta Business Help Center, About payment thresholds for Meta ads (2026)
- 10.Meta Business Help Center, About Ad Account Spending Limits (2026)
- 11.Meta Business Help Center, About Daily Spending Limits Set by Meta (2026)
- 12.Meta Business Help Center, Turn On the Two-Factor Authentication Requirement in Your Business Portfolio (2026)
- 13.Meta Business Help Center, Verify Your Domain in Business Manager (2026)
- 14.Meta Business Help Center, Add an Instagram Account to Your Business Portfolio (2026)
- 15.Meta Business Help Center, Ad Account Limits (2026)
- 16.Meta Business Help Center, About Classic Page Roles in the New Pages Experience (2026)
- 17.Meta for Business, Meta Verified for Businesses (2026)
Keep exploring
Turn ad research into winning ads
Research the ads that work, generate the creative on-brand, and launch to Meta, all in one tool.
7-day free trial · No credit card required